 In this detailed guide, we'll walk you through the step-by-step process of replacing brake pads and discs on your car.
Tools and Materials Needed:
- Jack and jack stands or a hydraulic lift
- Lug wrench or socket set
- C-clamp or brake caliper piston tool
- Brake cleaner
- Brake lubricant or anti-seize compound
- New brake pads and discs
- Torque wrench
- Brake fluid (optional, for bleeding brakes)
Step 1: Preparation
Park your car on a flat, level surface and engage the parking brake. Loosen the lug nuts on the wheels you'll be working on, but don't remove them completely. Place wheel chocks behind the wheels to prevent the car from rolling.
Step 2: Lift the Vehicle
Using a jack, lift the car off the ground and support it securely with jack stands. Ensure that the vehicle is stable and won't shift while you're working underneath it. If you have access to a hydraulic lift, you can use it for added convenience.
Step 3: Remove the Wheels
Once the car is safely elevated, remove the lug nuts and take off the wheels. Set them aside in a safe place.
Step 4: Remove the Brake Caliper
Locate the brake caliper assembly and remove the retaining bolts or clips that secure it in place. Carefully lift the caliper off the rotor and suspend it from the suspension using a piece of wire or bungee cord. Avoid letting the caliper hang by the brake hose, as this can damage the hose.
Step 5: Remove the Brake Pads
Inspect the brake pads for wear and deterioration. If they're worn down, remove them from the caliper by sliding them out of their mounting brackets. Take note of how the pads are oriented and positioned for reinstallation.
Step 6: Remove the Brake Disc
If you're replacing the brake discs, remove the caliper bracket bolts and take off the bracket. This will allow you to remove the old disc from the hub. In some cases, the disc may be stuck due to rust or corrosion. Use a rubber mallet or hammer to gently tap the rotor and loosen it from the hub.
Step 7: Install the New Brake Discs
Clean the hub surface thoroughly with brake cleaner to remove any dirt, grease, or rust. Place the new rotor onto the hub and secure it in place with the caliper bracket. Ensure that the rotor sits flush against the hub and spins freely without any interference.
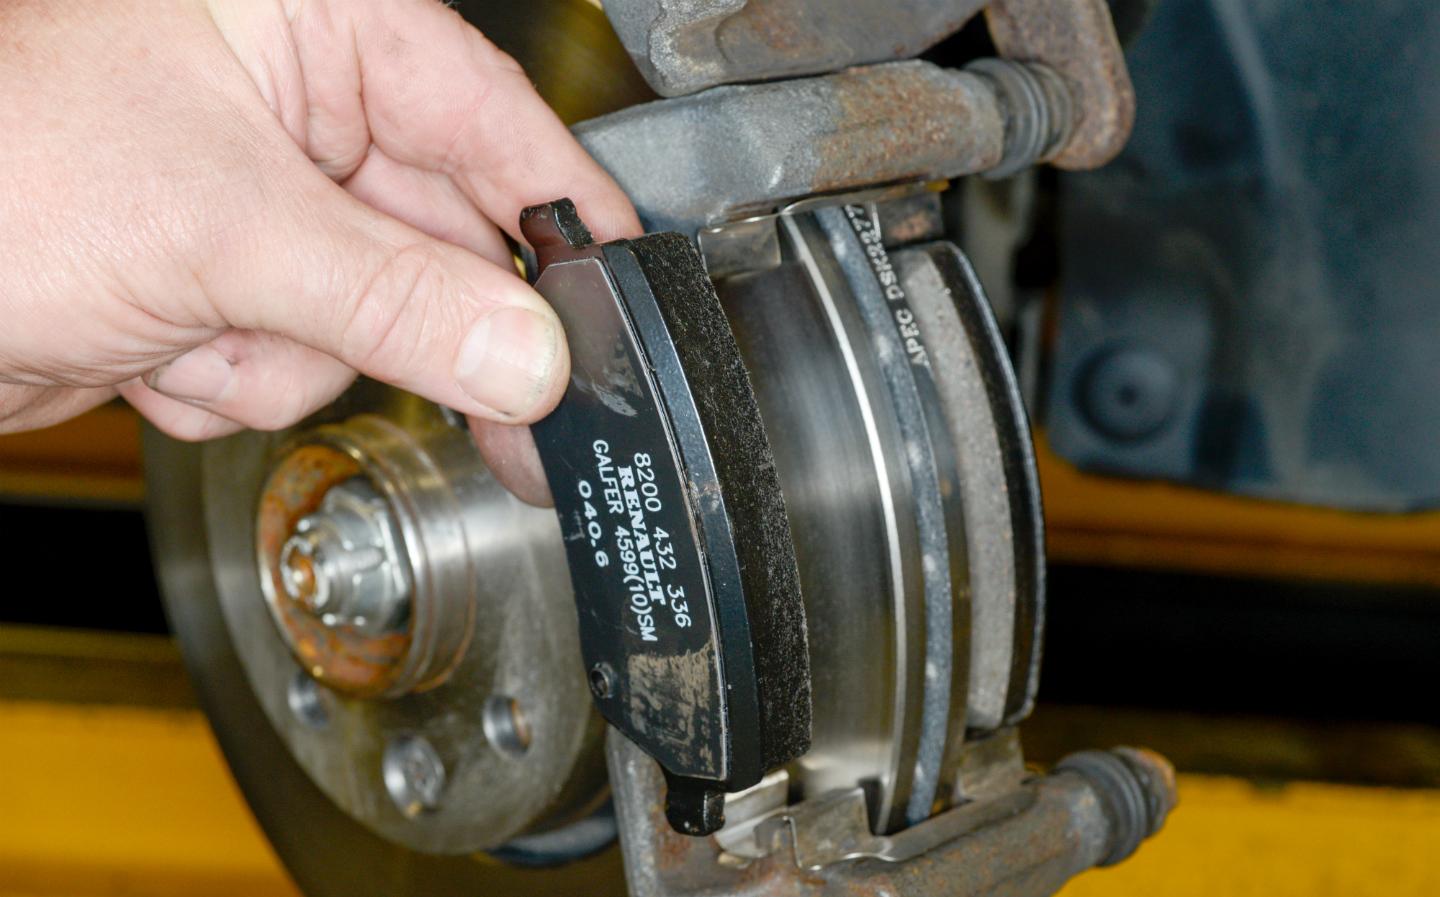
Step 8: Install the New Brake Pads
Apply a thin layer of brake lubricant or anti-seize compound to the backs of the new brake pads. Slide the pads into their respective mounting brackets on the caliper, ensuring that they're properly aligned and seated.
Step 9: Reinstall the Brake Caliper
Carefully lower the brake caliper onto the new brake pads and rotor. Make sure that the caliper piston is fully retracted to accommodate the new pads. Reinstall the caliper retaining bolts or clips and tighten them to the manufacturer's specifications.
Step 10: Repeat for the Other Side
Repeat the above steps for the remaining wheels, replacing both the brake pads and rotors as necessary.
Step 11: Bleed the Brakes (Optional)
If you opened the brake system during the process (such as when retracting the caliper piston), you may need to bleed the brakes to remove any air bubbles. Refer to your vehicle's owner's manual for the proper bleeding procedure.
Step 12: Reinstall the Wheels
Once all the brake pads and rotors have been replaced, and the calipers are securely in place, reinstall the wheels onto the vehicle. Tighten the lug nuts in a criss-cross pattern to ensure even pressure.
Step 13: Lower the Vehicle
Carefully lower the car off the jack stands or hydraulic lift and onto the ground. Torque the lug nuts to the manufacturer's specifications using a torque wrench.
Step 14: Test Drive
Before hitting the road, pump the brake pedal a few times to seat the new brake pads against the discs. Then, test the brakes at low speeds to ensure they're functioning properly. Listen for any unusual noises and pay attention to brake pedal feel.
Replacing brake pads and discs is a task that can be completed by DIY enthusiasts with the right tools and knowledge. By following the steps outlined in this guide and exercising caution and attention to detail, you can ensure the safety and performance of your vehicle's braking system. If you're unsure about any aspect of the process or encounter any difficulties, don't hesitate to consult a professional mechanic for assistance.
 In this detailed guide, we'll walk you through the step-by-step process of replacing brake pads and discs on your car.


